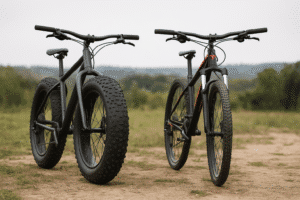
If you want to turn any bike into an e-bike, it’s easier than you might think. With the right conversion kit, you can give your regular bike an electric boost without buying a brand-new e-bike.
In this guide, I’ll show how I converted my own bike, plus the options you can use if you prefer a simpler or cheaper setup. You will see how to make your bike electric, what parts matter, and the steps to convert a bike to electric safely.
Key Takeaways:
- You can turn almost any regular bike into an e-bike using a conversion kit.
- Mid-drive kits give better climbing power; hub kits are simpler to install.
- Most projects take 4–6 hours and cost $200–$700.
- Always check your bike’s bottom bracket and brake setup before ordering.
Why I Decided to Turn My Bike Electric
I loved my bike, but my daily route had one long hill that made me avoid riding on hot days. I did not want to buy a whole new e-bike when my frame already fit me perfectly.
I also wanted a project I could learn from. Swapping parts and wiring a tidy setup sounded fun, and it would cost less than a new mid-range e-bike.
My goals were clear. Keep the budget reasonable, climb that hill without grinding, and keep the bike’s natural handling. A conversion kit checked all three boxes.
Finally, I liked the freedom. If a battery wears out later, I can replace it. If I change frames, I can move the kit over. That flexibility sold me.
How to Turn Any Bike Into an E-Bike
You can convert a regular bike to electric by adding a conversion kit that includes a motor, controller, display, and battery. The process is simple once you understand your bike’s measurements and what type of motor fits best.
I’ll walk you through each step of how I did it and the other options you can consider depending on your terrain and budget.
Step 1: Pick the Right Conversion Kit
The first and most important step is choosing the right kit. The motor type you select will determine how your e-bike performs, how easy it is to install, and how much it costs.
There are three main types of e-bike conversion kits: mid-drive, rear hub, and front hub. Each works differently and suits different kinds of riders.
1. Mid-Drive Motors (Best All-Around Option)
Mid-drive motors are mounted in the center of the bike, replacing the bottom bracket where your pedals connect. They drive power through your chain, using your bike’s gears just like your legs do.
Why I chose it: I went with the BAFANG BBS02B 750W 48V mid-drive kit. It fits most standard bikes (bottom bracket width 68–73 mm), delivers smooth power, and balances weight in the middle of the frame.
Pros:
- Best for hills and mixed terrain.
- Feels natural when pedaling.
- More efficient since it uses your gears.
Cons:
- Slightly more complex to install.
- Needs bottom bracket tools and basic mechanical skill.
If you often ride on steep roads or trails, or want an e-bike that feels powerful but balanced, a mid-drive kit like the BAFANG BBS02B is worth it.
2. Rear Hub Motors (Great for Commuters)
Rear hub kits are built directly into the back wheel. You simply replace your old rear wheel with the new one that contains the motor.
Why people choose it: It’s one of the easiest and most affordable ways to convert a bike to electric.
Recommended kits:
- AW 48V 1000W Rear Hub Kit: Powerful and simple. Good for flat terrain or mild hills.
- VEVOR 48V 1000W Hub Kit: Includes LCD display and pedal assist system for better control.
Pros:
- Easier installation than mid-drive.
- Great for city riders and commuters.
- Fewer moving parts to maintain.
Cons:
- Slightly heavier in the back.
- Not as good for steep climbs.
If you ride mostly on flat or gentle slopes and want a quick, budget-friendly project, a rear hub kit is ideal.
3. Front Hub Motors (Simplest to Install)
Front hub kits are the easiest way to turn your bike into an e-bike. The motor is in the front wheel, so you just swap it out and connect the throttle and controller.
Pros:
- Fastest to install.
- Balanced traction if your bike carries rear cargo.
- Good for light riders or short city commutes.
Cons:
- Less traction on gravel or wet surfaces.
- Can feel different when steering.
Front hub kits are great if you want to experiment with e-bikes without major mechanical work.
Voltage, Power, and Battery Selection
Once you pick your motor type, match the voltage and battery capacity to your needs:
- 36V: Best for casual city rides.
- 48V: Ideal for mixed terrain and balanced performance.
- 52V: Delivers more torque and range but costs more.
A 48V 13Ah battery can typically power 30–50 km on moderate pedal assist, depending on your weight, speed, and terrain.
Step 2: Check If Your Bike Is Compatible
Before ordering your kit, it’s important to make sure your bike can handle the motor and battery setup. Most regular bikes can be converted, but a few checks will save you trouble later.
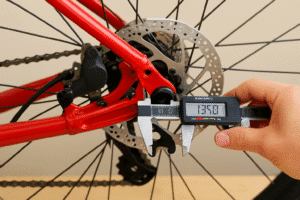
1. Measure Your Bottom Bracket (for Mid-drive Kits)
Use a simple ruler or caliper to measure the width of the bottom bracket shell on your bike frame. Most standard bikes measure 68 to 73 mm, which fits the BAFANG BBS02B and similar mid-drive motors. If your bike’s bracket is 100 mm or more, you’ll need the fat-bike version of the kit.
2. Check Wheel and Dropout Spacing (for Hub Kits)
Hub motors replace your wheel, so you need to know your dropout width:
- Front hubs: 100 mm
- Rear hubs: 135 mm
If your bike uses quick-release skewers or standard axles, these measurements will usually match perfectly. Some thru-axle frames or carbon forks are not compatible with hub motors, so double-check before ordering.
3. Identify Your Brake Type
Both disc and V-brake systems work with most e-bike kits, but you’ll want to match the wheel rim type. Hub kits often come pre-laced to a disc-compatible rim, and mid-drives power your chainring, so braking usually stays unchanged.
4. Consider Frame Strength and Material
Aluminum or steel frames are ideal for conversions. They handle torque better than carbon fiber frames, which can crack under stress from motor power.
5. Check Space for the Battery
The battery usually mounts inside the main triangle or on a rear rack. Measure the open triangle space before ordering. A 48V 13Ah battery typically fits inside most medium to large bike frames.
Quick tip: If you’re unsure about fit, you can send photos and measurements to the kit seller. Most, including BAFANG and AW, will confirm compatibility before you buy.
Step 3: Tools You’ll Need
You don’t need a full mechanic’s workshop, but having the right tools makes the job smoother and safer. The list depends slightly on your kit type, so here’s a quick breakdown.
| For Mid-Drive Kits | For Hub-Drive Kits |
|---|---|
| Bottom bracket removal tool | Tire levers and pump |
| Crank puller | Controller mounting bag |
| Allen wrench set | Zip ties or Velcro straps |
| Torque wrench | Basic screwdriver set |
| Chain tool and lubricant | Wire cutters |
| Bottom bracket grease | Wrench for axle nuts |
Optional but useful:
- A bike repair stand to hold the frame steady.
- Multimeter for testing voltage if your wiring doesn’t power up.
- Dielectric grease to seal connectors against moisture.
Most mid-drive kits like the BAFANG BBS02B come with a special wrench for the locking ring and a crank puller. Hub kits like AW or VEVOR usually include their controller, zip ties, and throttle cables.
Step 4: Installation Process
Once your tools and kit are ready, it’s time for the fun part: installing the system. This process takes about 4 to 6 hours for beginners and can be done over a weekend.
1. Remove the Old Components
Start by removing the cranks, chain, and bottom bracket if you’re installing a mid-drive motor. Clean the area with a degreaser to make sure the new motor sits flush against the frame.
If you’re using a hub kit, remove the existing wheel and swap in the new motorized wheel.
2. Mount the Motor or Wheel
- Mid-drive: Slide the motor through the bottom bracket shell and tighten the mounting plate and locking rings using the special wrench.
- Hub-drive: Fit the motor wheel into the dropouts, align the torque washers, and tighten the axle nuts securely.
Make sure cables don’t rub the frame or chainstay. A zip tie or small clip can help keep things tidy.
3. Install the Display, Throttle, and Sensors
Attach the display to the handlebar where you can see it easily. Connect the throttle and brake sensors. Some kits use plug-and-play connectors, color-coded for convenience. Follow the wiring diagram in the kit manual carefully.
4. Mount the Battery
Position the battery on the down tube inside the main triangle for balance. Secure it using the included base plate or clamps. If your frame doesn’t have space, a rear-rack battery is another option.
5. Connect the Wiring Harness
Plug the motor, battery, display, and throttle cables into the main harness. Most connectors are labeled or shaped to prevent mix-ups. Keep the wiring tidy with zip ties and avoid sharp bends.
6. Test the System
Before taking your first ride, power on the system while the bike is on a stand. Check the display, throttle response, and pedal assist. Spin the wheels to make sure the motor engages smoothly.
If the motor doesn’t start, recheck the battery connection and ensure the brake sensors aren’t stuck (some kits disable the motor when the brakes are active).
Step 5: First Ride and Real-World Results
Once everything was connected, I powered on the display, selected the first pedal-assist level, and took the bike for a short spin. The difference was instant.
Pedaling felt lighter and smoother, and the motor kicked in naturally after about half a pedal turn. The torque from the BAFANG BBS02B 750W was strong enough to flatten out hills that used to make me stand on the pedals.
On my first full test ride, I covered about 38 kilometers using mostly pedal assist level 2 and 3, riding through a mix of city streets and light slopes.
The 48V 13Ah battery still had about 30% charge left at the end, which means a real-world range of around 45 to 50 km per charge depending on weight, speed, and terrain.
Top speed on flat ground reached 28 to 30 km/h with pedal assist and up to 40 km/h using the throttle only. It felt steady and quiet, with very little vibration.
The only thing I adjusted afterward was the pedal assist sensitivity, which I lowered slightly for smoother starts in traffic.
Overall, it turned my regular bike into a reliable daily commuter with plenty of power for hills.
How Much It Cost Me
Here’s the full breakdown of what I spent to convert my bike:
| Item | Details | Cost |
|---|---|---|
| BAFANG BBS02B 750W Kit (with battery) | Includes motor, 48V 13Ah battery, display, throttle, and brake sensors | $416 |
| Extra tools and supplies | Bottom bracket wrench, cable ties, grease | $35 |
| Total | — | $451 |
You can spend less if you go with a hub motor kit like AW or VEVOR, which cost about $200–$250 and require less time to install. However, the mid-drive setup delivers better torque and a more natural riding feel, especially if you deal with hills or longer commutes.
Safety, Battery Care, and Legal Notes
Always wear a helmet and use front and rear lights when riding an e-bike. The extra speed and torque mean you’ll reach intersections faster than most drivers expect. Make sure your brakes are in good shape and check bolts and wiring after the first few rides.
When it comes to battery care, store it indoors at room temperature, and avoid charging immediately after a long ride when the pack is still warm.
For long-term health, charge between 20% and 80% most of the time. Avoid complete discharges, which can shorten the battery’s life.
Finally, check your local e-bike laws. Many regions classify electric bikes into Class 1, 2, or 3 depending on top speed and throttle use.
In most areas, keeping your assist limit under 25–32 km/h (15–20 mph) ensures it’s road legal without registration. Staying within those limits will help you ride safely and avoid fines while still enjoying the full benefits of your converted e-bike.
Read more:
Final Words
Turning a regular bike into an e-bike is one of the most rewarding DIY projects I’ve done.
It gave new life to a bike I already loved, saved money compared to buying a new e-bike, and taught me exactly how electric systems work.
With the right conversion kit, a few basic tools, and a free afternoon, almost anyone can do the same. If you want strong hill-climbing power and a natural ride, go for a mid-drive kit like the BAFANG BBS02B.
If you prefer a quick and affordable build for flat routes, hub kits like AW or VEVOR are great options. Whichever route you take, the result is the same: a faster, easier, and more enjoyable ride every day.
FAQs
Can you turn any bike into an e-bike?
Yes, most standard bikes can be converted into e-bikes as long as the frame, brakes, and wheel sizes fit the conversion kit. Aluminum or steel frames work best since they can handle the extra torque and weight safely.
How fast can a converted bike go?
A converted bike typically reaches 25–32 km/h (15–20 mph) with pedal assist, depending on motor power and settings. Some 750W or 1000W kits can reach 40 km/h (25 mph) on throttle mode, but local speed limits may apply.
How long does it take to install a kit?
Most conversions take about 4–6 hours for beginners. Hub kits are quicker since you only swap the wheel and connect a few cables, while mid-drive kits require removing the crank and bottom bracket.
How much does it cost to convert a bike to electric?
Conversion kits start around $200 for basic hub motors and go up to $400–$700 for complete mid-drive kits with batteries. The total cost depends on motor size, battery capacity, and the tools you already have.
Michael Josh is a hands-on e-bike tester and reviewer at BoltBikers, known for putting every model through real-world rides before sharing his thoughts. With a sharp eye for performance, comfort, and build quality, he helps the team choose which bikes are worth featuring. Backed by years of experience in tech and gear reviews, Michael brings trusted, honest insights to help readers find the right e-bike for their needs.