If your e-bike brakes are rubbing, squeaking, or losing stopping power, it might be time for a quick tune-up. Knowing how to adjust hydraulic brakes on an electric bike can help you fix common issues without a trip to the repair shop.
With just a few tools and some patience, you can align the calipers, fix rotor rubbing, and get your braking power back, safely and smoothly.
TL;DR
To adjust hydraulic brakes on an electric bike, start by loosening the caliper bolts with a 5mm Allen key. Then, squeeze the brake lever and hold it to center the caliper over the rotor. While still holding the lever, tighten the bolts evenly. Spin the wheel to check for rubbing. If it still scrapes, fine-tune the caliper position or gently true the rotor. This quick process usually fixes most rubbing and alignment issues at home.
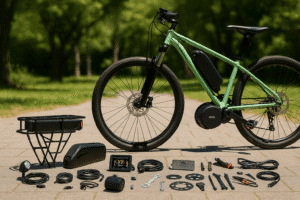
Tools You’ll Need
Before you dive in, make sure you’ve got a few basic tools nearby. Nothing fancy—just the stuff that makes the job easier:
- 5mm Allen key (also called a hex key)
- Torque wrench (if you want to tighten bolts to the correct tightness)
- A way to lift the e-bike so the wheel can spin freely (bike stand or flip the bike upside down)
- Clean rag
- Rubbing alcohol or brake cleaner
- Flashlight (optional, but helps a lot when inspecting the caliper area)
- Rotor truing tool (if your rotor is slightly bent and causing rubbing)
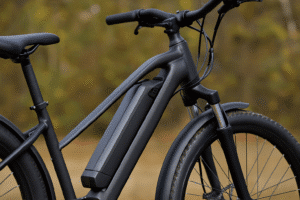
Preparing Your E-Bike for Brake Adjustment

You don’t want to mess with the brakes while the bike is on or the wheel’s loose. Here’s what I always do first:
- Turn off your e-bike and remove the battery.
- Press the power button once after removing the battery to discharge any leftover power.
- Check that the wheel (front or rear) is seated properly in the dropouts.
- Tighten the axle or quick-release lever securely so nothing’s wobbling around.
How to Adjust Hydraulic Brakes on an Electric Bike
Here’s how to adjust the hydraulic brakes on an e-bike:
- Loosen the caliper bolts with a 5mm Allen key
- Squeeze the brake lever and hold it
- Tighten the bolts while still holding the lever
- Spin the wheel to check for rubbing
- If needed, adjust the caliper or use a rotor truing tool
Now let’s break each of those steps down a bit so you can follow along without confusion.
Step 1: Loosen the Caliper Bolts
Find the two bolts that attach the brake caliper to the frame or fork. These are usually 5mm Allen bolts. You don’t need to take them all the way out—just loosen them enough so the caliper can wiggle slightly side to side. That movement is key for alignment.
I usually give the caliper a little wiggle with my hand to make sure it’s loose enough to move freely.
Step 2: Squeeze the Brake Lever and Hold It
Next, spin the wheel a few times to make sure the rotor is centered. Then squeeze the brake lever and hold it. This moves the hydraulic pistons out evenly on both sides of the rotor, which helps center the brake pads.
While holding the lever, don’t let go. This is the point where things line up naturally. The brake pads “grab” the rotor and hold everything in place.
Step 3: Tighten the Caliper Bolts While Holding the Lever
With your other hand, use the 5mm Allen key to tighten both caliper bolts back down. Try to tighten them evenly, top and bottom, so you don’t shift the alignment. If you’ve got a torque wrench, aim for about 6–8 Nm.
Only release the brake lever once both bolts are tight. That part’s important—otherwise the caliper might shift before it’s secured.
Step 4: Spin the Wheel and Listen for Rubbing
Give the wheel a spin. Ideally, it should spin freely with no scraping or dragging sounds. If you do hear a rubbing sound, it’s usually just the rotor brushing against one of the pads.
If it’s only rubbing in one or two spots, it might be a slightly bent rotor, which leads us to the next step.
Step 5: Fine-Tune the Alignment or True the Rotor
First, look through the caliper and check if the rotor is sitting closer to one side. A flashlight really helps here. If one side is rubbing, loosen just the top bolt slightly, nudge the caliper in the opposite direction, and retighten. Repeat the same with the bottom bolt if needed.
Still hearing rubbing in a specific spot? The rotor might be slightly warped. I’ve had this happen a few times. That’s when the rotor truing tool comes in handy.
Gently bend the rotor in the opposite direction of the rub—just a light touch. You’re not twisting metal here, just giving it a gentle push.
I usually go slow and check after every tiny adjustment.
How to True a Brake Rotor (If Rubbing Persists)
Sometimes, even after adjusting the caliper, the rotor still rubs in one or two spots. That’s usually because the rotor is slightly bent. It doesn’t take much—just a little warp from a bump or even from leaning the bike the wrong way during transport.
To fix it, you’ll need a rotor truing tool (or an adjustable wrench in a pinch). Spin the wheel slowly and listen for where it rubs. When you find the spot, use the tool to gently bend the rotor away from the pad it’s touching.
Be patient—small tweaks go a long way. I’ve done this several times and found it takes a bit of back-and-forth to get it just right.
How to Adjust Brake Lever Reach
Adjusting the brake lever reach makes your ride more comfortable, especially if your fingers have to stretch too far to grab the lever.
Here’s how you can tweak it:
- Look for a small set screw or dial near the brake lever (usually on the inside).
- Use a 2mm Allen key or a small screwdriver depending on your brake model.
- Turn clockwise to bring the lever closer to the handlebar.
- Turn counterclockwise to move it farther away.
- Test the feel as you go—you’re aiming for something that’s easy to reach without being too sensitive.
Troubleshooting Common Brake Issues
Even after a good adjustment, brakes can act up. Here are a few common problems I’ve run into—and how to deal with them.
Squealing Brakes
Squeaky brakes are super common and usually happen because something, oil, water, or dust, got on the rotor or brake pads. I once rode through a puddle, and my brakes squealed for the rest of the ride.
To fix it, clean the rotor and pads with rubbing alcohol or a dedicated brake cleaner. Sometimes, lightly sanding the surface of the pads can hel,p too. Avoid touching the rotor with your bare fingers since oils from your skin can cause it to squeal again.
Spongy or Soft Brake Lever
If your brake lever feels mushy or goes almost all the way to the grip, there’s probably air in the hydraulic line. It can sneak in over time or after a brake pad swap.
The fix is a brake bleed. You’ll need a bleed kit for your specific brake system and some patience. I usually leave this to a bike shop unless I’m feeling confident and have plenty of time. Once the air is out, the lever should feel firm again.
Brakes That Rub Constantly
When the rotor constantly brushes against the pads, even after adjustments, it could be because the caliper isn’t perfectly aligned, or the rotor is warped. Sometimes it’s both.
First, double-check the caliper position using the squeeze-and-tighten method. If that doesn’t fix it, go ahead and check the rotor for any wobbles and true it gently. Don’t forget to inspect the wheel to make sure it’s sitting correctly in the dropouts too.
Inconsistent Braking
If your brakes feel strong one minute and weak the next, uneven pad wear or a glazed rotor might be to blame. I had this happen after a long downhill ride—it felt like the brakes just gave up halfway down.
Take a look at the pads and rotor. If the pads look uneven or too thin, replace them. If the rotor looks shiny or discolored, it might be glazed, and a light sanding could help. Consistent braking comes from clean, even contact between pad and rotor.
Maintenance Tips for Long-Lasting Brake Performance
Keeping your brakes in good shape doesn’t take a ton of effort—just a bit of regular care. Here’s what I usually do:
- Check your brake pad thickness every month or two, especially if you ride often.
- Clean your rotors with rubbing alcohol if they start making noise.
- Avoid touching the rotor with your hands—it only takes a little oil to mess things up.
- Inspect your caliper alignment and rotor trueness after any bumpy ride or crash.
- Bleed your hydraulic brakes once a year, or anytime the lever starts feeling soft.
Small habits like these go a long way. You don’t have to obsess over it—just give things a once-over now and then, and you’ll avoid bigger issues down the line.
Final Words
Adjusting hydraulic brakes on an electric bike isn’t as complicated as it might seem. Once you’ve done it a couple of times, it starts to feel pretty routine.
The main thing is making sure your caliper is lined up right and your rotor isn’t bent. If you can handle those two things, you’re 90% of the way there.
A quiet, smooth brake means better control, safer rides, and a much more enjoyable time on your e-bike. Whether it’s a quick tweak or a deeper fix, a bit of brake maintenance goes a long way.
Take your time, trust your ears (and your fingers), and don’t be afraid to get hands-on with it.
FAQs
How often should I adjust hydraulic brakes?
Usually every 3–6 months, or whenever you hear rubbing or notice a drop in brake performance. If you ride daily, you might need to check things a bit more often.
Can I ride with slightly rubbing brakes?
Technically yes, but it’s not ideal. A little rub might not stop you, but it adds drag and can wear out your pads faster. It’s worth fixing when you have the time.
How do I know if my brake rotor is bent?
Spin the wheel and watch the rotor as it passes through the brake caliper. If it wobbles or only rubs at one specific point, it’s probably bent. You can usually fix it with a rotor truing tool.
What’s the difference between hydraulic and mechanical brake adjustment?
Hydraulic brakes adjust through caliper alignment and lever reach—no cable tension involved. Mechanical brakes rely on pulling or loosening a cable to change how the pads move. Hydraulics are more precise but a little trickier to bleed or repair.
Michael Josh is a hands-on e-bike tester and reviewer at BoltBikers, known for putting every model through real-world rides before sharing his thoughts. With a sharp eye for performance, comfort, and build quality, he helps the team choose which bikes are worth featuring. Backed by years of experience in tech and gear reviews, Michael brings trusted, honest insights to help readers find the right e-bike for their needs.